

The first time I made these potato crunchy tenders was on a rainy Sunday afternoon when my son had three friends over for a playdate. I’d run out of breadcrumbs and panko, and the thought of bundling everyone into the car for a grocery store trip seemed daunting. Standing in my kitchen, scanning the pantry for alternatives, my eyes landed on a box of instant mashed potatoes I’d bought for camping trips. That moment of kitchen improvisation turned into one of our family’s most requested meals.
What started as a necessity has become something of a signature dish in our home. I’ve tested these tenders countless times, adjusting seasonings and techniques until they achieved that perfect balance – a golden, crunchy exterior that gives way to juicy, tender chicken inside. The instant potato coating creates a crust that’s somehow both lighter and crispier than traditional breadcrumbs, with a subtle savory note that keeps everyone reaching for more.
Why These Work So Well
The magic of these tenders lies in that unconventional coating. When I first experimented with instant potatoes as a breading, I wasn’t sure what to expect. Would they get crispy? Would the flavor work? After several test batches (and happy taste-testers around my dining table), I discovered that instant potato flakes actually create an incredible texture – lighter than breadcrumbs but with more substance and crunch than a simple flour dredge.
I’ve found the garlic-flavored variety adds just the right savory depth without overwhelming the chicken. The flakes also brown beautifully, creating that golden exterior we all crave in a good chicken tender. My mother-in-law couldn’t believe they weren’t “restaurant-quality” when I served them at our last family dinner.
What You’ll Need
Chicken tenders: Fresh is best, but I’ve made these with frozen tenders (completely thawed) with great results when that’s what I have on hand.
Garlic flavored instant mashed potatoes: This is our secret weapon! The pre-seasoned variety adds flavor without extra work, but I’ve used plain instant potatoes with added garlic powder when that’s all I had.
Milk: Creates the perfect consistency for the egg wash that helps the coating adhere. I’ve used plant-based milks when cooking for my lactose-intolerant niece with great success.
Egg: Provides the protein structure that helps bind everything together.
Salt and pepper: Simple but essential. I measure these for consistent results, but feel free to adjust to your taste.
Vegetable oil: For that perfect golden fry. I’ve tested with canola and avocado oils too – both work beautifully.
Let’s Get Cooking
Prepare Your Stations
I like to set up a little assembly line on my counter near the stove. I pour the oil into my favorite large skillet (the cast iron one I inherited from my grandmother) and set it over medium heat. This gives the oil time to reach the right temperature while I prepare everything else.
In one shallow bowl, I whisk together the milk and egg until well combined. In another bowl, I mix the instant potato flakes with salt and pepper. Having everything ready makes the coating process much smoother – a lesson I learned after many chaotic dinner preps!
The Coating Magic
The key to perfectly coated tenders is working systematically. I place all the chicken in the milk mixture first, stirring gently to ensure each piece is thoroughly coated. Then, one by one, I lift each tender out, let the excess milk drip off for a second, and roll it in the potato flakes.
I’ve found a light touch works best here – press the flakes gently onto the chicken to help them adhere, but don’t compact them too much or you’ll lose some of that wonderful texture. The first few times I made these, I was too aggressive with the coating and ended up with a denser crust.
The Perfect Fry
When the oil is hot (I test it by sprinkling in a few potato flakes – they should sizzle immediately), I carefully add the tenders, being careful not to overcrowd the pan. This was a mistake I made early on – too many tenders at once lowers the oil temperature and results in soggy rather than crispy coating.
I cook them until they’re beautifully golden brown, usually about 7-10 minutes, turning them halfway through for even browning. Each batch comes out of the oil onto a paper towel-lined plate, where they rest briefly before serving. That little rest allows the juices to redistribute through the chicken while the excess oil drains away.
Make Them Your Own
After making these countless times in my kitchen, I’ve developed some favorite variations:
For my husband’s birthday dinner last month, I added a teaspoon of smoked paprika to the potato flake mixture. The subtle smokiness was incredible with our homemade ranch dipping sauce.
When my spice-loving sister visits, I mix a half teaspoon of cayenne pepper into the coating for a gentle heat that builds with each bite.
For a more herbaceous version that’s lovely in spring, I sometimes add a tablespoon of dried Italian herbs to the mix. The fragrance that fills the kitchen as they fry is absolutely wonderful.
My Best Tips
After many batches of these tenders (and a few early failures), I’ve learned that maintaining oil temperature is crucial. If the oil gets too hot, the coating browns before the chicken cooks through; too cool, and they absorb oil and become greasy. Medium heat has consistently given me the best results.
Don’t rush the coating process. I’ve found that letting the coated tenders sit for about 5 minutes before frying helps the coating adhere better to the chicken.
If you’re making a large batch for a gathering (as I did for my son’s birthday party), you can keep the first batches warm in a 250°F oven while you finish frying the rest. Place them on a wire rack over a baking sheet rather than directly on the sheet to maintain that wonderful crispness.
For the juiciest tenders, I’ve found that brining the chicken for even just 30 minutes in salt water makes a noticeable difference, especially if you’re using chicken breast cut into strips rather than pre-cut tenders.
Frequently Asked Questions
Can I bake these instead of frying? → Yes! I’ve tested a baked version where I spray the coated tenders with cooking oil and bake at 425°F for about 15-18 minutes. They’re not quite as crispy as the fried version but still delicious and a bit lighter.
How do I store leftovers? → On the rare occasion we have leftovers, I store them in an airtight container in the refrigerator for up to 2 days. Reheating in a 375°F oven for about 10 minutes restores much of the crispness.
Can I use chicken breasts instead of tenders? → Absolutely! I’ve made these with chicken breasts cut into strips many times. Just make sure the strips are relatively uniform in size for even cooking.
What dipping sauces work best? → We love these with homemade honey mustard or ranch, but my children are partial to BBQ sauce. The subtle garlic flavor in the coating pairs well with almost any dip!
Can I prepare these in advance? → You can coat the chicken up to 2 hours ahead and keep it refrigerated until ready to fry. Any longer and the coating may begin to soften.
Print
Potato Crunchy Tenders
- Total Time: 25 minutes
- Yield: 4 servings 1x
Description
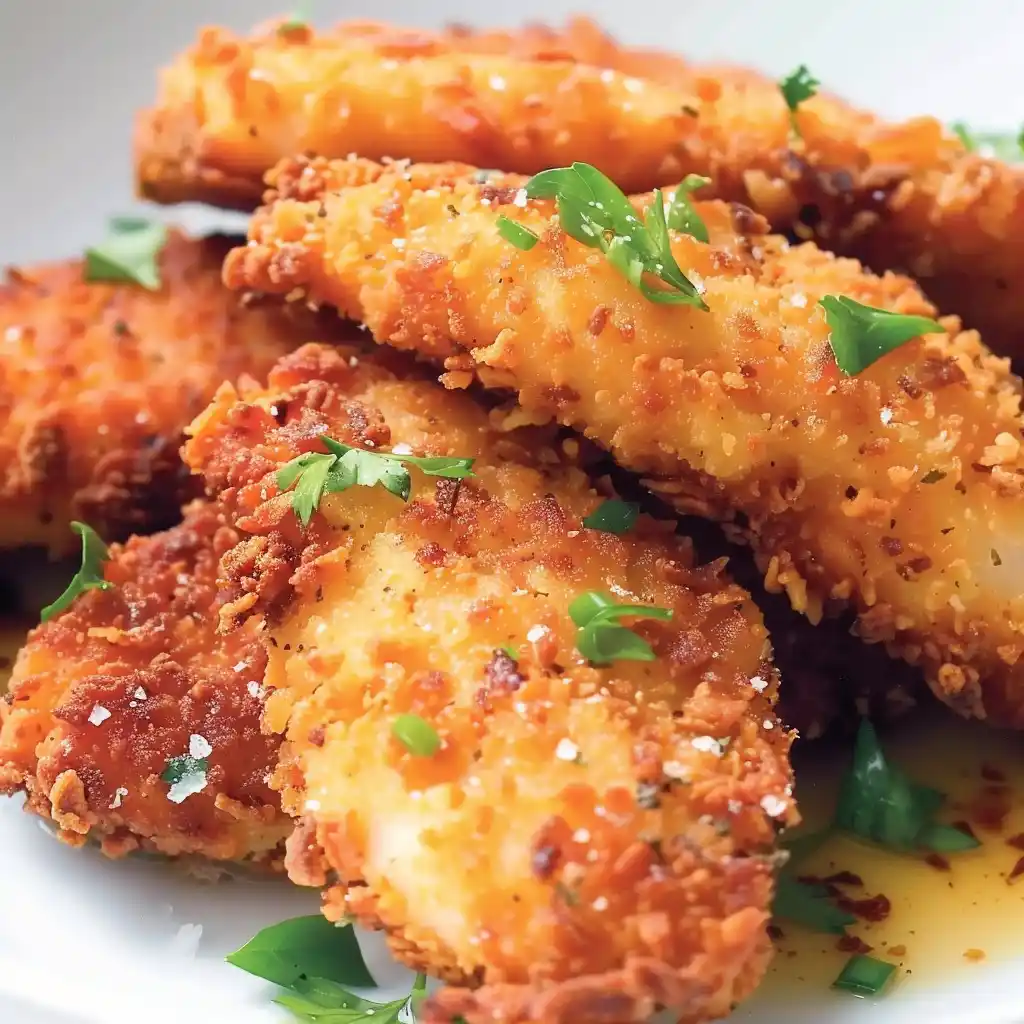
Crispy on the outside, tender on the inside, these potato-crusted chicken tenders offer a delicious twist on classic chicken strips with a uniquely satisfying crunch from instant mashed potato coating.
Ingredients
- ½ cup vegetable oil for frying
- 1 ½ cups milk
- 1 egg
- 1 (7.6 ounce) package garlic flavored instant mashed potatoes
- 2 teaspoons salt
- 2 teaspoons ground black pepper
- 1 ½ pounds chicken tenders
Instructions
- Prepare the Cooking Station: Heat ½ cup vegetable oil in a large skillet over medium heat until it reaches approximately 350°F (175°C). You want the oil hot enough to create a sizzle when the chicken is added, but not so hot that it burns the coating before cooking the chicken through.
- Create Dipping Stations: In a shallow bowl, beat together 1½ cups milk and 1 egg until well combined to create your wet dipping station. In another shallow bowl, thoroughly mix the garlic flavored instant mashed potatoes with 2 teaspoons salt and 2 teaspoons black pepper to create your dry coating station.
- Coat the Chicken: Dip each chicken tender into the milk and egg mixture, ensuring it’s fully coated. Allow excess liquid to drip off, then thoroughly dredge in the seasoned potato flake mixture, pressing gently to adhere the coating to all sides of the chicken.
- Fry to Perfection: Carefully place the coated chicken tenders in the hot oil, being careful not to overcrowd the pan (work in batches if necessary). Cook until golden brown and crispy on all sides, approximately 7-10 minutes, or until the chicken reaches an internal temperature of 165°F (74°C).
- Drain and Serve: Once cooked, transfer the chicken tenders to a paper towel-lined plate to drain excess oil. Allow them to rest for 2-3 minutes before serving to maintain maximum crispiness.
Notes
- For extra crispiness, you can double-dip the chicken: coat in egg mixture, then potato flakes, then back in egg mixture, and finally in potato flakes again.
- The instant mashed potato coating can be customized with additional herbs or spices like paprika, garlic powder, or Italian seasoning.
- For a healthier version, these can be baked at 400°F (200°C) for 15-20 minutes on a lightly oiled baking sheet.
- Serve with dipping sauces like ranch, honey mustard, or barbecue sauce for added flavor variety.
- Prep Time: 15 minutes
- Cook Time: 10 minutes
- Category: Main-course
- Method: Frying
- Cuisine: American
Nutrition
- Serving Size: 3-4 tenders
- Calories: 425
- Sugar: 4g
- Sodium: 820mg
- Fat: 18g
- Saturated Fat: 3g
- Unsaturated Fat: 14g
- Trans Fat: 0g
- Carbohydrates: 32g
- Fiber: 2g
- Protein: 32g
- Cholesterol: 115mg