


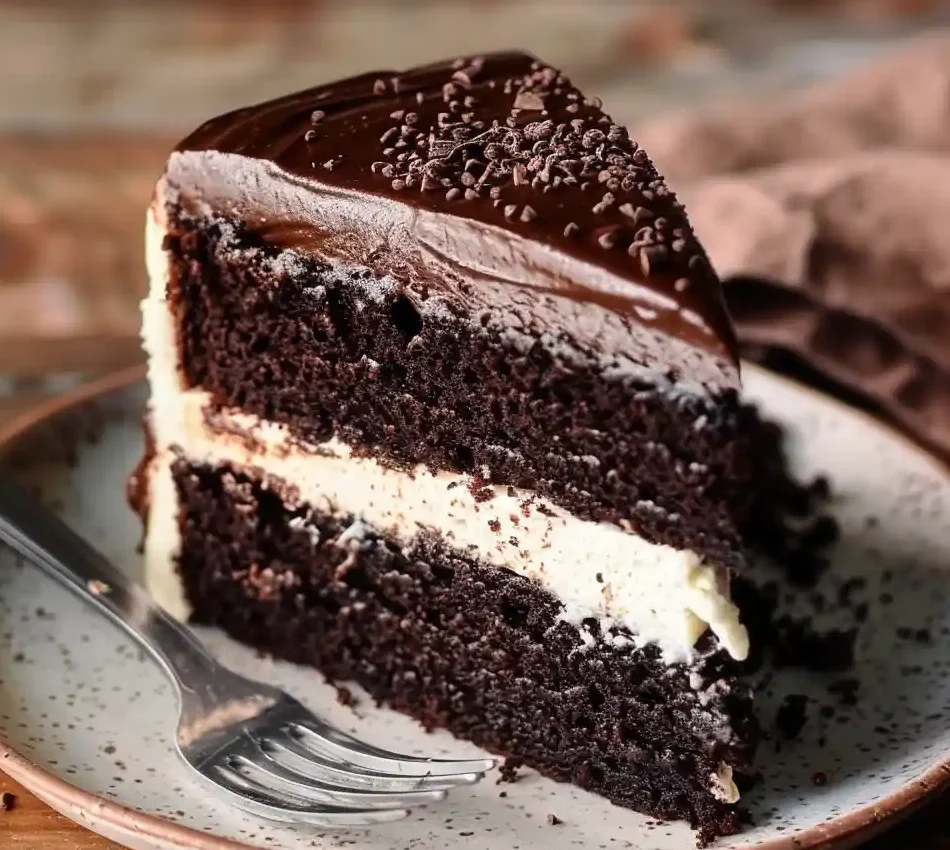
This Homemade Ding Dong Cake is a nostalgic throwback to the beloved snack cakes of childhood, but elevated with rich, made-from-scratch components. Featuring two layers of moist chocolate cake sandwiching a creamy vanilla filling and enrobed in glossy chocolate ganache, this dessert perfectly balances sophisticated flavor with playful nostalgia.
Why You’ll Love This Recipe
- Delivers the nostalgic taste of a classic snack cake with premium homemade quality
- The cake stays incredibly moist thanks to the combination of butter, oil, and coffee
- The filling is silky smooth with a pudding-like base that’s miles better than store-bought
- Makes an impressive presentation despite being relatively straightforward to prepare
- Can be made ahead of time, making it perfect for special occasions
Ingredients
- All-purpose flour: Creates the foundation for our cake and helps thicken the filling – use unbleached for best results
- Granulated sugar: Provides sweetness for both the cake and the creamy filling – don’t substitute with alternatives as they’ll affect the texture
- Light brown sugar: Adds moisture and a subtle molasses flavor to the chocolate cake layers
- Unsweetened cocoa powder: Use natural cocoa powder (not Dutch-processed) to react properly with the baking soda
- Baking soda: Provides the perfect rise and tender crumb – make sure it’s fresh for best results
- Salt: Enhances all the flavors in both the cake and filling – kosher salt works beautifully
- Unsalted butter: Used in all three components for richness – bring to room temperature for the filling
- Neutral oil: Makes the cake incredibly moist and keeps it soft even when refrigerated
- Eggs: Provide structure and richness – bring to room temperature for best incorporation
- Vanilla extract: Enhances both the cake and filling with aromatic flavor – use clear vanilla for a traditional white filling
- Buttermilk: Adds tenderness and tanginess to the cake – room temperature ensures even mixing
- Hot coffee: Intensifies the chocolate flavor without adding coffee taste – hot water works too
- Whole milk: Creates the base for the creamy filling – don’t substitute lower-fat alternatives
- Semi-sweet chocolate: Forms the shiny ganache coating – high-quality chocolate yields best results
- Heavy cream: Combines with chocolate for a smooth, glossy ganache
Variations
Mint Chocolate Version
Transform this classic into a refreshing mint chocolate treat by adding 1/2 teaspoon of mint extract to the filling. For visual appeal, tint the filling with a drop of green food coloring and top the ganache with crushed peppermint candies or chocolate mint cookies.
Peanut Butter Lovers
Create a peanut butter cup-inspired cake by adding 1/2 cup smooth peanut butter to the filling mixture. For extra indulgence, sprinkle chopped peanut butter cups between the layers or press them around the bottom edge of the frosted cake.
Mocha Ding Dong
Enhance the coffee notes by adding 1 tablespoon instant espresso powder to the cake batter and another teaspoon to the ganache. This creates a sophisticated mocha flavor profile perfect for coffee lovers.
How to Make the Recipe
Step 1: Prepare the Filling Base
Start by whisking sugar, flour, and salt in a medium saucepan until well combined. Gradually pour in the milk while continuously whisking to prevent lumps. Cook this mixture over medium heat, stirring constantly to prevent scorching, until it thickens to a pudding-like consistency. Remove from heat, transfer to a bowl, and immediately cover the surface with plastic wrap to prevent a skin from forming. Allow to cool completely to room temperature.
Step 2: Bake the Chocolate Cake Layers
Preheat your oven to 350°F and prepare two 8-inch round cake pans with grease and parchment paper. In a large bowl, whisk the dry ingredients thoroughly to remove any lumps. Add the melted butter and oil, mixing until the mixture resembles wet sand. Incorporate the eggs, egg yolk, and vanilla, stirring until smooth. Add the buttermilk and stir until just combined. Finally, carefully pour in the hot coffee, stirring slowly at first to prevent splashing, then more vigorously until you achieve a smooth, pourable batter. Divide evenly between pans and bake until a toothpick comes out with a few moist crumbs, about 33-35 minutes. Cool initially in the pans before transferring to a wire rack.
Step 3: Complete the Cream Filling
Using a stand mixer or hand mixer, beat the softened butter until light and fluffy, about 3 minutes. With the mixer running on medium-low, add the cooled filling base one tablespoon at a time, allowing each addition to incorporate fully before adding more. Add the vanilla extract and increase speed to medium-high, whipping until the filling becomes airy and mousse-like. Refrigerate briefly to firm up slightly while preparing the ganache.
Step 4: Make the Chocolate Ganache
Place chopped chocolate in a heat-resistant bowl. Heat the heavy cream just until it begins to simmer at the edges, then pour over the chocolate. Let stand for 1 minute, then gently stir from the center outward until smooth and glossy. Allow the ganache to cool at room temperature, stirring occasionally, until it reaches a spreadable consistency – thick enough to coat the cake without running off.
Step 5: Assemble the Cake
Ensure cake layers are completely cool before assembly. Level the tops if needed for a flat surface. Place one layer on a serving plate and spread the filling evenly, leaving about 1/4 inch from the edge (it will spread with the weight of the top layer). Carefully place the second layer on top and gently press down. Smooth any filling that squeezes out around the sides. Chill for 15 minutes to set the filling. Apply the ganache to the top of the cake first, then work your way down the sides using an offset spatula for a smooth finish. Refrigerate for at least 15 minutes before serving.
Tips for Making the Recipe
- The hot coffee doesn’t make the cake taste like coffee – it enhances the chocolate flavor, but you can substitute hot water if needed
- For the smoothest filling, make sure the base is completely cooled before mixing with butter
- Chill the assembled cake before adding ganache to prevent the filling from melting
- To get clean cake slices, dip your knife in hot water and wipe dry between each cut
- Room temperature ingredients incorporate much better than cold ones, especially for the cake batter
- If your ganache becomes too firm, gently warm it over a double boiler or for a few seconds in the microwave
How to Serve
Serve this decadent cake slightly chilled for the best texture and flavor contrast. The cake can be brought to room temperature for about 20 minutes before serving for a softer texture. Pair slices with a cold glass of milk for the ultimate nostalgic experience, or with coffee for a more sophisticated presentation. For special occasions, garnish each serving plate with a light dusting of cocoa powder, fresh berries, or a small dollop of whipped cream to enhance the presentation.
Make Ahead
This cake is perfect for making ahead as it actually improves with time. The filling base can be made up to 3 days in advance and stored in the refrigerator with plastic wrap pressed directly on the surface. The cake layers can be baked up to 2 days ahead, wrapped tightly in plastic wrap once completely cooled, and stored at room temperature.
The fully assembled cake can be refrigerated for up to 3 days. For longer storage, you can freeze the unfrosted cake layers (wrapped individually in plastic wrap and aluminum foil) for up to 2 months. The completed cake also freezes well for up to 1 month – simply thaw overnight in the refrigerator before serving.
FAQs
Can I make this cake in a 9×13 pan instead of round layers?
Yes! You can bake the cake in a 9×13 inch pan for about 35-40 minutes. Once cooled, slice the cake horizontally to create two layers. Spread the filling on the bottom layer, top with the second layer, and finish with ganache as directed.
My filling seems too runny. What did I do wrong?
The most common issue is not cooking the filling base long enough. It should be very thick, like pudding, before cooling. Another possibility is that the base wasn’t completely cooled before mixing with butter. If your filling is runny, refrigerate it for 30 minutes to firm up before assembling the cake.
Can I use Dutch-processed cocoa powder instead of natural?
While natural cocoa powder works best with the baking soda in this recipe, you can substitute Dutch-processed cocoa if needed. If using Dutch-processed, add 1/2 teaspoon of baking powder to the dry ingredients to ensure proper rise.
How can I tell when the cake is done without overbaking it?
The toothpick test is your best indicator – it should come out with a few moist crumbs, not completely clean (which would indicate overbaking) and not with wet batter (underbaking). The cake will also slightly pull away from the sides of the pan and spring back when gently pressed in the center.
Conclusion
This Homemade Ding Dong Cake transforms a beloved childhood treat into a show-stopping dessert that’s perfect for special occasions or whenever you need a dose of nostalgic sweetness. With its moist chocolate layers, creamy vanilla filling, and glossy ganache coating, it strikes the perfect balance between sophistication and pure fun. The make-ahead friendly components make it practical for entertaining, while the impressive presentation will have everyone asking for your secret recipe. Give this upgraded classic a try – it’s sure to become a new favorite in your dessert repertoire!
Print
Ding Dong Cake
- Total Time: 3 hours (including cooling and chilling time)
- Yield: 12 servings 1x
- Diet: Vegetarian
Description
A decadent homemade version of the classic Hostess treat, featuring moist chocolate cake layers sandwiched with a creamy vanilla filling and covered in rich chocolate ganache. This nostalgic dessert perfectly balances sweet and chocolatey flavors for an irresistible indulgence.
Ingredients
- For the Cake:
- 1¾ cups all-purpose flour
- 1 cup granulated sugar
- 1 cup light brown sugar (packed)
- ¾ cup unsweetened natural cocoa powder
- 1½ tsp baking soda
- ¾ tsp salt
- ½ cup unsalted butter, melted
- ½ cup neutral oil (vegetable or canola)
- 2 large eggs + 1 egg yolk
- 2 tsp vanilla extract
- 1 cup buttermilk (room temperature)
- ½ cup hot coffee (or hot water)
- For the Filling Base:
- 1 cup granulated sugar
- 5 tbsp all-purpose flour
- ¼ tsp salt
- 1 cup whole milk
- For the Filling:
- 1 cup unsalted butter, softened
- 1 tsp clear or regular vanilla extract
- Cooled filling base (from above)
- For the Ganache:
- 8 oz semi-sweet chocolate, chopped
- 1 cup heavy cream
Instructions
- Prepare the Filling Base
- Begin by making the pudding-like base for your filling. In a medium saucepan, whisk together the sugar, flour, and salt until well combined. Slowly pour in the milk while whisking continuously to prevent lumps. Heat the mixture over medium heat, stirring constantly, until it thickens to a pudding-like consistency. This typically takes about 5-7 minutes. Transfer the thickened mixture to a bowl, press plastic wrap directly onto the surface to prevent a skin from forming, and set aside to cool completely to room temperature.
- Bake the Chocolate Cake Layers
- Preheat your oven to 350°F (175°C) and prepare two 8-inch round cake pans by greasing them and lining the bottoms with parchment paper. In a large mixing bowl, whisk together the flour, granulated sugar, brown sugar, cocoa powder, baking soda, and salt. Add the melted butter and oil, mixing until the dry ingredients are moistened. Incorporate the eggs, egg yolk, and vanilla extract, stirring until smooth. Add the buttermilk and mix until well combined. Finally, carefully pour in the hot coffee or water and stir until you have a smooth, somewhat thin batter. Divide the batter evenly between the prepared pans and bake for 33-35 minutes, or until a toothpick inserted in the center comes out with just a few moist crumbs. Let the cakes cool in the pans for 15 minutes before removing them to a wire rack to cool completely.
- Complete the Creamy Filling
- Once your filling base has completely cooled, it’s time to transform it into a light, fluffy filling. In a stand mixer fitted with the paddle attachment (or using a hand mixer), beat the softened butter until it’s light and fluffy, about 2-3 minutes. Gradually add the cooled filling base one tablespoon at a time, mixing well after each addition to ensure smooth incorporation. Add the vanilla extract and continue beating for another 3-4 minutes until the filling is smooth, airy, and resembles a whipped frosting texture. Place the finished filling in the refrigerator for 15-20 minutes to slightly firm up while you prepare the ganache.
- Create the Chocolate Ganache
- Place the chopped chocolate in a heatproof bowl. Heat the heavy cream in a small saucepan just until it begins to simmer (do not boil). Pour the hot cream over the chocolate and let it sit undisturbed for 2-3 minutes to allow the chocolate to melt. Then, gently stir until the mixture becomes smooth and glossy. Alternatively, you can place the chocolate and cream in a microwave-safe bowl and heat in 25-second intervals, stirring between each, until smooth. Allow the ganache to cool at room temperature until it thickens to a spreadable consistency, about 15-20 minutes.
- Assemble the Cake
- Once all components are ready, begin assembly by ensuring your cake layers are completely cool and level. If needed, use a serrated knife to trim the domed tops off the cakes. Place one cake layer on a serving plate or cake stand. Spread all of the prepared filling evenly over this bottom layer, going almost to the edges (it’s okay if some filling squishes out when you add the top layer). Carefully place the second cake layer on top of the filling and press down gently to secure it. Use an offset spatula to smooth any excess filling that may have squeezed out around the sides. Refrigerate the assembled cake for about 15 minutes to set the filling. Finally, pour or spread the chocolate ganache over the top of the cake, allowing it to drip down the sides for a beautiful finish. Use an offset spatula to ensure even coverage. Refrigerate for at least 15 more minutes before slicing and serving.
Notes
- For the richest chocolate flavor, use hot coffee instead of hot water in the cake batter. The coffee enhances the chocolate taste without adding coffee flavor.
- The filling is similar to a traditional ermine or boiled milk frosting, which was the original frosting used for red velvet cakes.
- This cake can be stored in the refrigerator for up to 5 days. Let it sit at room temperature for about 30 minutes before serving for the best texture and flavor.
- For a more authentic Ding Dong look, you can pipe a small swirl of white frosting on top of each slice.
- Prep Time: 45 minutes
- Cook Time: 35 minutes
- Category: Desserts
- Method: Baking
- Cuisine: American
Nutrition
- Serving Size: 1 slice
- Calories: 650
- Sugar: 62g
- Sodium: 320mg
- Fat: 36g
- Saturated Fat: 20g
- Unsaturated Fat: 14g
- Trans Fat: 0g
- Carbohydrates: 80g
- Fiber: 3g
- Protein: 7g
- Cholesterol: 115mg