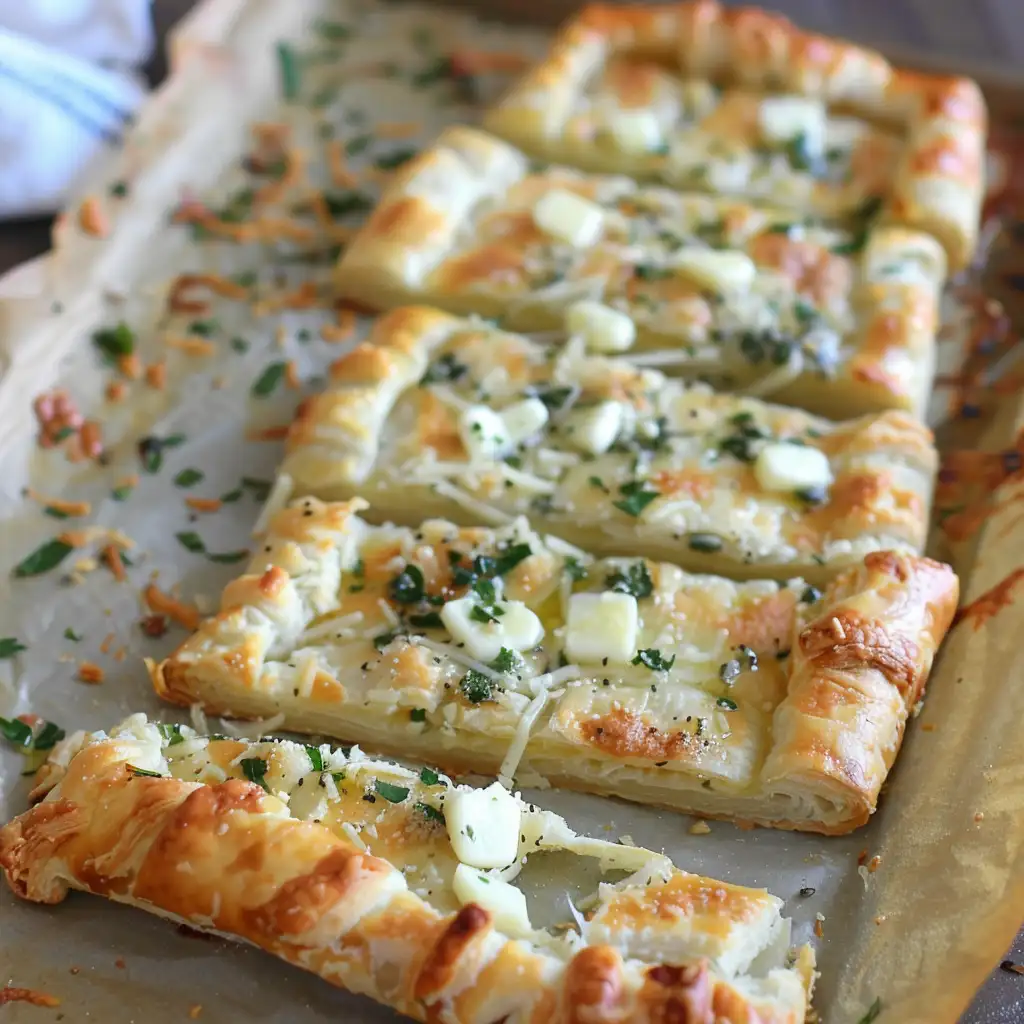
There’s something magical about the aroma of garlic and butter wafting through my kitchen. This garlic cheese pastry became a staple in my home almost by accident. One evening, faced with unexpected dinner guests and limited ingredients, I improvised with a sheet of puff pastry from the freezer and whatever I had in my cheese drawer. The result was this beautifully golden, crispy pastry that disappeared faster than any elaborate appetizer I’d ever made. Since then, I’ve refined it through countless gatherings, tweaking the garlic-to-butter ratio and experimenting with cheese combinations until it reached what my family now considers perfection.
Simple Ingredients, Extraordinary Results
What I love most about this recipe is how just a handful of ingredients transform into something that feels special enough for company yet simple enough for a weeknight treat. The key lies in the butter mixture – I’ve found that thoroughly combining the softened butter with garlic creates tiny pockets of flavor that melt beautifully into the puff pastry as it bakes.
I’ve tested this recipe dozens of times in my kitchen, and I’ve learned that scoring the pastry before the initial bake is crucial. This technique creates that beautiful puffed border while keeping the cheesy center perfectly contained. When photographing this by my dining room window last month, I couldn’t help but admire how the golden edges caught the afternoon light.
What You’ll Need
Butter: Softened to room temperature; the foundation of our flavor base that creates a spreadable mixture.
Garlic cloves: Fresh gives the most vibrant flavor, but I’ve used minced from a jar in a pinch.
Dried parsley: Adds a subtle herby note and beautiful flecks of green; fresh works wonderfully too if you have it on hand.
Salt and pepper: I use kosher salt and freshly ground black pepper for the best flavor control.
Mozzarella cheese: Provides that irresistible cheese pull; I prefer low-moisture for less soggy results.
Parmesan cheese: The secret flavor booster that adds nutty depth; I’ve used both pre-grated and freshly grated with success.
Puff pastry: The canvas for our creation; I typically use Pepperidge Farm, but any brand works beautifully.
Let’s Get Baking
Prep Your Canvas
Remove your puff pastry from the freezer and allow it to thaw according to the package instructions – usually about 40 minutes at room temperature. While waiting, preheat your oven to 400°F and line a baking sheet with parchment paper (this prevents sticking and makes cleanup so much easier).
Create Your Flavor Base
In a small bowl, mix your softened butter, minced garlic, dried parsley, and a pinch of salt and pepper until well combined. Fold in both cheeses until evenly distributed. I love watching these simple ingredients come together, knowing the magic they’ll create.
Prepare the Pastry
Once thawed, cut the pastry sheet in half to create two rectangles. Using a sharp knife, score a border about ½ inch from the edge, cutting only halfway through the thickness of the dough. This creates that beautiful puffed edge while keeping the filling contained. Place both pieces on your prepared baking sheet.
The Magic Happens
Bake the plain scored pastry for 10 minutes first – this initial bake helps prevent a soggy center when we add our butter mixture. After those 10 minutes, spread half of your cheese-butter mixture inside each scored border. The warm pastry will start to melt the mixture slightly, which is exactly what we want.
Return to the oven for another 8-10 minutes until the edges are golden and the cheese is melted. For that extra special finish, I sometimes switch the oven to broil for the final 1-2 minutes, keeping a close eye to avoid burning. The result should be gorgeously golden with bubbling cheese.
Let the pastries cool for about 5 minutes before slicing into thick pieces – this brief rest allows the filling to set just enough for cleaner slices.
Make It Your Own
Over the years, I’ve created countless variations of this basic recipe. Last Christmas, I added a sprinkle of crushed red pepper flakes for a festive kick that my brother-in-law still talks about. During summer, I often fold in a tablespoon of fresh basil from my little kitchen herb garden instead of dried parsley, which pairs beautifully with garden-ripe tomato soup.
For my vegetable-loving friends, I’ve tried adding thin slices of mushroom on top of the cheese mixture before the final bake – they release their moisture and become wonderfully savory. When I’m feeling particularly indulgent, a drizzle of honey over the finished pastry adds a surprising sweet contrast to the savory garlic and cheese.
What I’ve Learned
After making this countless times, I’ve gathered some helpful insights:
- Room temperature butter is non-negotiable – cold butter won’t incorporate properly with the garlic and herbs.
- Don’t skip the initial 10-minute bake before adding the cheese mixture. I learned this the hard way after serving several batches with undercooked centers.
- The pastry needs breathing room on the baking sheet. When I’ve crowded the pan, the edges don’t puff as dramatically.
- Letting the pastry rest for 5 minutes after baking makes all the difference in how cleanly it slices – a lesson I learned while frantically preparing for my sister’s baby shower.
Frequently Asked Questions
Can I prepare this in advance? → You can mix the butter-cheese mixture up to two days ahead and keep refrigerated. Just bring it to room temperature before spreading.
My puff pastry stuck to the pan. What happened? → Parchment paper is your friend here! I’ve had this happen when rushing and skipping the parchment.
Can I use other cheeses? → Absolutely! I’ve made it with gruyère for a more sophisticated flavor and cheddar for my nephew who’s a picky eater. Both were delicious.
How do I store leftovers? → On the rare occasion there are leftovers, I wrap them in foil and refrigerate. A quick 5-minute reheat in a 350°F oven restores the crispy texture.
Can I freeze the assembled but unbaked pastry? → I don’t recommend it – the moisture in the filling can make the pastry soggy when thawed. Better to bake fresh.
This simple pastry has become my reliable friend for everything from last-minute dinner parties to quiet Sunday afternoons with a good book. It reminds me that sometimes the most beloved recipes come from necessity and simple ingredients rather than elaborate plans. I hope it brings the same ease and joy to your kitchen as it has to mine.
Print
Cheesy Garlic Puff Pastry
- Total Time: 35 minutes
- Yield: 8 servings 1x
- Diet: Vegetarian
Description
A buttery, golden puff pastry topped with a rich blend of garlic and cheeses – perfect as an elegant appetizer or side dish to complement any meal.
Ingredients
- 1/4 cup butter, softened
- 2 cloves garlic, minced
- 1 Tablespoon dried parsley
- Salt and pepper, to taste
- 1/2 cup shredded mozzarella cheese
- 1/4 cup grated parmesan cheese
- 1 sheet puff pastry
Instructions
- Thaw the Puff Pastry: Remove one sheet of puff pastry from freezer and thaw according to package instructions, typically 30-40 minutes at room temperature until pliable but still cool to the touch.
- Prepare the Oven: Preheat the oven to 400°F (200°C). Line a baking sheet with parchment paper to prevent sticking and make cleanup easier.
- Make the Cheese Mixture: In a small bowl, combine the softened butter, minced garlic, dried parsley, salt, pepper, shredded mozzarella, and grated parmesan. Mix thoroughly until all ingredients are well incorporated into a spreadable paste. Set aside.
- Prepare the Pastry: Cut the pastry sheet in half to create two rectangles. Using a sharp knife, score a border approximately 1/2 inch from the edge of each pastry piece, cutting about halfway through the thickness. This creates a frame that will puff up around the filling.
- Initial Baking: Place the scored pastry pieces on the parchment-lined baking sheet. Bake for 10 minutes, allowing the pastry to begin puffing and establishing the borders.
- Add the Cheese Topping: Remove the partially baked pastry from the oven. Spread half of the cheese-butter mixture over each piece of puff pastry, keeping within the scored border.
- Final Baking: Return the pastry to the oven and bake for an additional 8-10 minutes, until the pastry is golden and the cheese is melted. For an extra golden top, switch the oven to broil setting with the rack positioned about 6 inches from the heat source. Broil for 1-2 minutes, watching carefully to prevent burning.
- Cool and Serve: Allow the cheese pastry to cool for approximately 5 minutes before slicing into thick pieces. This brief cooling period helps the cheese set slightly for cleaner cutting.
Notes
- For best results, ensure the puff pastry is cold but pliable when working with it. If it becomes too warm, it won’t puff properly.
- You can customize this recipe by adding herbs like thyme or rosemary, or incorporating other cheeses like gruyere or fontina.
- For a spicy variation, add a pinch of red pepper flakes to the cheese mixture.
- The pastry can be prepared ahead of time up to the scoring step, then refrigerated for up to 24 hours before baking.
- Prep Time: 15 minutes
- Cook Time: 20 minutes
- Category: Appetizers
- Method: Baking
- Cuisine: Italian-American
Nutrition
- Serving Size: 1 slice
- Calories: 220
- Sugar: 1g
- Sodium: 250mg
- Fat: 17g
- Saturated Fat: 7g
- Unsaturated Fat: 9g
- Trans Fat: 0g
- Carbohydrates: 13g
- Fiber: 1g
- Protein: 5g
- Cholesterol: 20mg


