

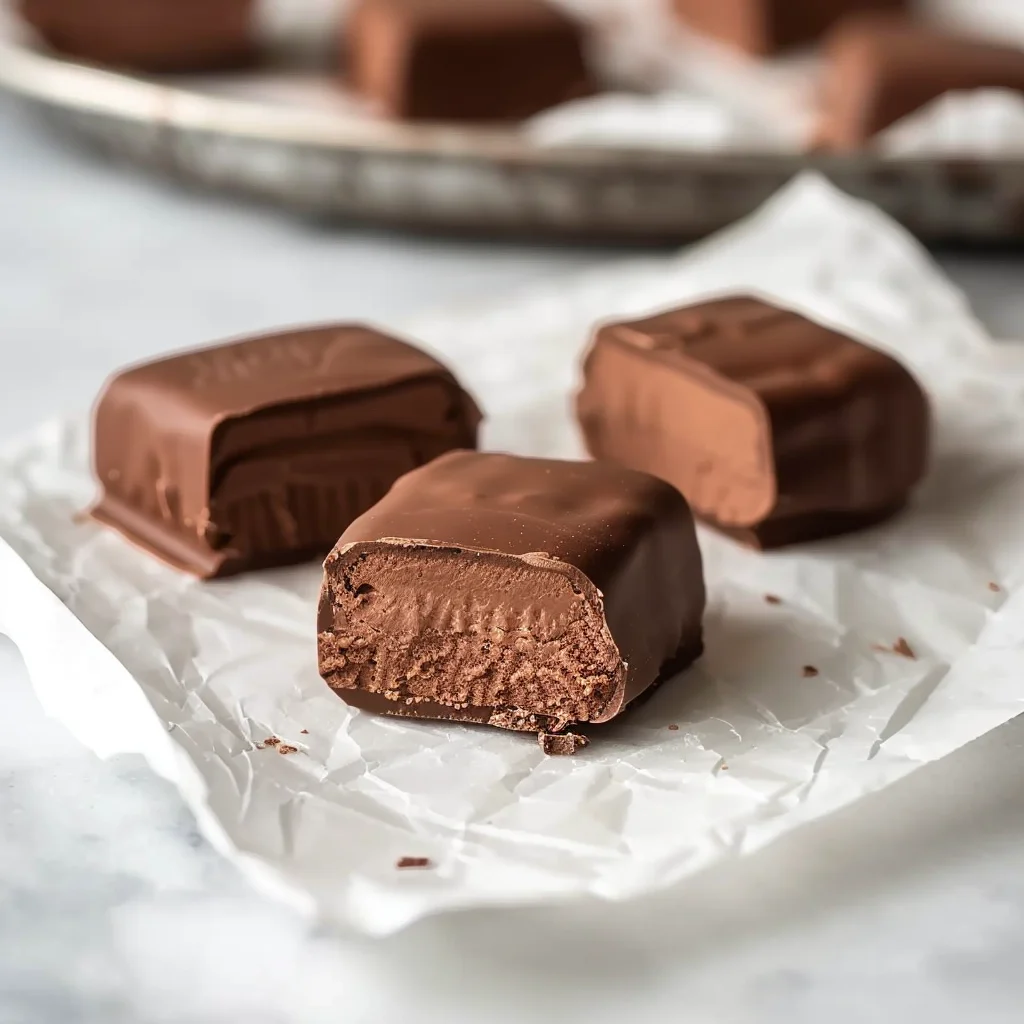
This Cool Whip candy reminds me of those simple desserts that somehow made childhood summers feel magical. With just a handful of ingredients, it transforms into a fudge-like treat that’s creamy, rich, and perfectly sweet without being overwhelming.
Why This Chocolate Cloud Works
- Only needs 4 basic ingredients you probably already have
- No baking or candy thermometer required—perfect for beginners
- Customizable with endless topping possibilities
- Takes just 10 minutes of active prep time
- Makes a great holiday gift or potluck contribution
The Sweet Symphony of Ingredients
Cool Whip
The star of the show that creates that cloud-like texture. Make sure it’s fully thawed but still cold for the best results. If you prefer homemade whipped cream, you can substitute, but the texture may vary slightly.
Chocolate Chips
Semi-sweet chips provide the perfect balance of sweetness and chocolate flavor. Dark chocolate works wonderfully for a more intense flavor, or milk chocolate if you prefer things sweeter.
Powdered Sugar
This optional ingredient adds extra sweetness and helps with the structure. You can adjust the amount based on your sweet tooth or skip it entirely if you’re using milk chocolate chips.
Vanilla Extract
A subtle flavor enhancer that rounds out the chocolate. Almond extract makes a delicious alternative if you want to experiment.
Make It Your Own
White Chocolate Wonder
Swap the semi-sweet chips for white chocolate and add a drop of food coloring for themed treats. Pink for Valentine’s Day or green for St. Patrick’s Day works beautifully.
Cookies & Cream Dream
Mix in crushed Oreos or your favorite sandwich cookies into the base and sprinkle more on top for a cookies and cream version that disappears fast at parties.
Nutty Delight
Fold in toasted pecans, walnuts, or almonds for a satisfying crunch that contrasts wonderfully with the smooth chocolate mixture.
Let’s Cook
Step 1: Melt with Care
Patience is key when melting chocolate. Use 30-second intervals in the microwave, stirring thoroughly between each. The residual heat will continue melting the chocolate even after you take it out, so stop when it’s almost fully melted to prevent scorching.
Step 2: The Perfect Blend
When combining the melted chocolate with Cool Whip, fold gently rather than stirring vigorously. This preserves the airy texture that makes this candy special. The mixture will look marbled at first but keep folding until it’s uniform.
Step 3: Setting Up for Success
Spread the mixture evenly in your lined pan, then give it a little tap on the counter to release any air bubbles. Add your toppings while the surface is still tacky so they’ll stick properly.
Smart Tips from My Kitchen
- Chill your mixing bowl before adding Cool Whip for better consistency
- Use an offset spatula for perfectly smooth spreading in the pan
- If the melted chocolate seems too thick, add a teaspoon of neutral oil
- Score the top lightly before it fully sets to make cutting easier later
- For cleaner cuts, dip your knife in hot water and wipe dry between slices
- Keep the candy in the refrigerator until just before serving—it softens quickly at room temperature
Serving Suggestions
This candy shines when cut into small squares and served on a pretty platter. For an elegant dessert table, alternate with fresh berries or pair with coffee ice cream for a simple but impressive dessert. It’s perfect with a cup of hot coffee or cold milk to balance the sweetness.
Prep Ahead & Leftovers
This candy actually improves with time as the flavors meld. Make it up to three days ahead and keep it refrigerated. For storage, layer pieces between parchment paper in an airtight container. While you can freeze it for up to a month, the texture is best when fresh or refrigerated.
Your Questions Answered
Can I make this without dairy?
Yes! Look for dairy-free Cool Whip alternatives and dairy-free chocolate chips. The results are nearly identical.
Why did my candy not set properly?
This usually happens if the Cool Whip was too warm when mixed. Make sure it’s thawed but still cold from the refrigerator.
How long does this candy last?
When stored in the refrigerator in an airtight container, it stays fresh for about a week, though the texture is best within the first 3-4 days.
Can I use this as a frosting?
Absolutely! If you spread it immediately after mixing (before chilling), it makes a delightful frosting for cakes or cupcakes.
Sweet Memories in the Making
There’s something about simple recipes like this Cool Whip candy that brings people together. Whether you’re making it with kids or serving it to friends, it’s the kind of treat that creates moments worth remembering. Give it a try next time you need a quick dessert without turning on the oven—your sweet tooth will thank you!
Print
Easy Cool Whip Candy Recipe
- Total Time: 2 hours 15 minutes (including chilling time)
- Yield: 16 pieces 1x
- Diet: Vegetarian
Description
This delightful no-bake chocolate candy combines the creamy texture of Cool Whip with rich chocolate for a quick, crowd-pleasing treat that requires minimal ingredients and effort.
Ingredients
- 1 (8 oz) tub Cool Whip, thawed
- 1 (12 oz) bag semi-sweet chocolate chips (or white chocolate chips for a variation)
- ½ cup powdered sugar (optional, for extra sweetness)
- 1 tsp vanilla extract (optional)
- Sprinkles, nuts, or crushed cookies for topping (optional)
Instructions
- Melt the Chocolate: In a microwave-safe bowl, melt the chocolate chips. Do this in 30-second intervals, stirring in between, until the chocolate is completely melted and smooth. This gradual melting prevents the chocolate from burning and ensures a silky texture.
- Combine with Cool Whip: In a large bowl, combine the melted chocolate with the Cool Whip. If you’re using powdered sugar and vanilla extract, add them as well. Mix until everything is well blended. The mixture should be uniform in color with no white streaks remaining.
- Prepare Pan: Line an 8×8 inch baking pan with parchment paper or wax paper for easy removal. Make sure the paper extends up the sides of the pan to serve as handles when removing the candy later.
- Spread the Mixture: Pour the Cool Whip and chocolate mixture into the prepared pan. Spread it out evenly with a spatula, making sure to reach all corners and create a level surface.
- Add Toppings: If you’re using toppings like sprinkles, nuts, or crushed cookies, sprinkle them over the top. Press them lightly into the surface to ensure they adhere to the candy.
- Chill: Place the pan in the refrigerator and chill for at least 2 hours, or until the candy is set and firm. For best results, allow it to chill overnight.
- Cut and Serve: Once set, lift the candy out of the pan using the edges of the parchment paper. Cut into squares or desired shapes. Serve chilled.
Notes
- Store in an airtight container in the refrigerator for up to 5 days.
- For a festive holiday variation, use white chocolate and add peppermint extract instead of vanilla.
- The candy can also be frozen for up to 1 month. Thaw in the refrigerator before serving.
- Try adding a tablespoon of peanut butter to the chocolate for a nutty flavor variation.
- For best texture, make sure the Cool Whip is fully thawed before mixing with the chocolate.
- Prep Time: 15 minutes
- Cook Time: 0 minutes
- Category: Desserts
- Method: No-cook
- Cuisine: American
Nutrition
- Serving Size: 1 piece
- Calories: 180
- Sugar: 15g
- Sodium: 20mg
- Fat: 10g
- Saturated Fat: 7g
- Unsaturated Fat: 3g
- Trans Fat: 0g
- Carbohydrates: 18g
- Fiber: 1g
- Protein: 1g
- Cholesterol: 5mg