

There’s something deeply satisfying about a meal that balances crispy textures with creamy sauces, all wrapped up in a neat little package. These honey mustard chicken wraps came to life during one of my Sunday meal prep sessions last summer. I was looking for something that would hold up well for my husband’s lunch the next day but wouldn’t compromise on flavor or texture. After several attempts (and more than a few messy kitchen counters), I landed on this version that combines crispy fried chicken with a tangy honey mustard slaw.
What I love most about these wraps is how they transform simple ingredients into something that feels special. The contrast between the warm, crispy chicken and the cool, crunchy slaw creates this perfect harmony that makes every bite interesting. My kitchen smelled like a mix of fried chicken and sweet honey mustard for hours afterward – not that anyone was complaining!
The Magic of Crunch and Cream
These wraps work beautifully because they balance multiple textures and flavors. The chicken tenders are double-dredged to create that extra crispy coating that stays crunchy even when wrapped. I discovered this technique after my first few attempts left me with soggy chicken by lunchtime. Now, even when packed away for a few hours, the chicken maintains that delightful crunch.
The honey mustard slaw provides both creaminess and acidity to cut through the richness of the fried chicken. I’ve found that allowing the slaw to sit for about 15 minutes before assembling the wraps lets the cabbage soften just slightly while still maintaining its crunch – something I learned after serving it too soon and having half the slaw fall out of my wrap!
What You’ll Need
For the slaw:
- Shredded green cabbage: Fresh and crunchy; I’ve tried pre-shredded bags but find that hand-shredding gives me the perfect thickness for these wraps
- Shredded carrot: Adds color, sweetness, and extra nutrients; I sometimes use a vegetable peeler to create long, thin strips
- Honey mustard: The binding element that brings everything together; my homemade version adds a subtle kick with a touch of cayenne
- Ground black pepper: Freshly ground makes all the difference in brightening the slaw
For the chicken:
- High smoke point oil: I typically use canola or peanut oil, which maintains its stability at the high temperatures needed for frying
- Chicken tenderloins: They cook quickly and evenly; you could substitute chicken breasts cut into strips, but tenderloins give the best texture
- Buttermilk and egg: Creates the perfect binding layer that helps the coating stick; the tanginess also tenderizes the chicken
- All-purpose flour: The base for our coating; I’ve tried various flours, but regular AP flour creates the most consistent crust
- Spice blend: Garlic powder, kosher salt, onion powder, paprika, and black pepper create a seasoned coating that complements the honey mustard without overwhelming it
For assembly:
- Large tortillas or wraps: I prefer flour tortillas for their flexibility and neutral flavor, though spinach wraps add a nice color contrast for special occasions
- Diced tomato: Adds freshness and juiciness; in winter, I sometimes substitute roasted red peppers
- Sliced dill pickles: Don’t skip these! The briny crunch cuts through the richness and adds complexity
- Shredded cheese: I’ve tried them all, and pepper Jack is my favorite for the subtle heat it brings, but any melty cheese works beautifully
Let’s Get Cooking
Prepare the Slaw First
In a medium bowl, I mix the cabbage and carrots with the honey mustard and black pepper. I like to make this first so the flavors have time to meld while I prepare the chicken. Sometimes I add a tiny splash of apple cider vinegar if I want extra tanginess. The slaw should be moist enough to cling together but not swimming in dressing.
Set Up Your Frying Station
When frying, organization is key. I start heating my oil in a heavy cast-iron skillet while I prepare the chicken. Setting up a station with the flour mixture in one shallow dish and the buttermilk-egg mixture in another makes the process so much smoother. I learned this the hard way after creating a flour storm in my kitchen during my first attempt!
Double-Dredge for Extra Crunch
The secret to perfectly crispy chicken is in the double-dredge. I coat each tenderloin in the seasoned flour first, then dip in the buttermilk mixture, and finally back into the flour. I press the flour gently into the chicken to create little craggy bits that become extra crispy when fried. After testing countless batches, I’ve found that letting the coated chicken rest for about 5 minutes before frying helps the coating adhere better.
Fry with Patience
Working in batches is crucial – overcrowding the pan lowers the oil temperature and results in greasy chicken instead of crispy perfection. I fry until the coating turns a beautiful golden brown, about 5 minutes per batch. Between batches, I always let the oil return to temperature, which I monitor with a thermometer clipped to the side of my pan.
Assemble with Care
For the perfect wrap, I lay out each tortilla and spread a thin layer of honey mustard slaw down the center, leaving room at the edges. Then I add the tomatoes, pickles, and cheese before topping with sliced chicken tenders. I’ve found that slicing the chicken makes for easier eating, though my husband prefers his wraps with whole tenders. A final drizzle of honey mustard brings everything together before I fold and roll each wrap.
Make Them Your Own
Over the months of making these wraps, I’ve created several variations that have become favorites in our home:
For Sunday brunch last month, I swapped the chicken for crispy bacon and added scrambled eggs for a breakfast-inspired version that disappeared before I could even take a photo for Instagram.
When my vegetarian sister visited, I substituted the chicken with crispy cauliflower florets dredged in the same coating and fried until golden. She loved them so much she asked for the recipe before heading home.
During late summer, when my garden tomatoes are at their peak, I make a fresh pico de gallo instead of using diced tomatoes. The bright acidity pairs beautifully with the rich chicken and creamy slaw.
What I’ve Learned
After many iterations of these wraps, I’ve collected some helpful insights:
Don’t overcrowd your frying pan. I learned this lesson when I tried to rush and ended up with chicken that was golden on the outside but underdone inside. Patience yields perfect chicken every time.
The temperature of your oil matters tremendously. Too hot and the coating burns before the chicken cooks; too cool and the chicken absorbs oil, becoming greasy. My sweet spot is exactly 350°F.
For make-ahead wraps, keep the components separate until just before eating. When I pack these for lunches, I store the slaw and chicken separately and assemble in the morning. This prevents the tortilla from becoming soggy.
Let the chicken rest on paper towels for a few minutes after frying. This simple step allows excess oil to drain away, keeping your wraps from becoming greasy messes.
Frequently Asked Questions
Can I bake the chicken instead of frying it? → Yes! I’ve tested a baked version where I spray the coated chicken with cooking oil and bake at 425°F for about 15-18 minutes. The coating isn’t quite as crispy, but it’s still delicious and much less hands-on.
How do I make your homemade honey mustard? → I mix 1/2 cup mayonnaise, 2 tablespoons Dijon mustard, 2 tablespoons honey, 1 teaspoon lemon juice, and a pinch of cayenne pepper. It keeps in the refrigerator for up to a week and works wonderfully on salads too.
Can I make these ahead of time? → Absolutely! The chicken stays crispy for about 24 hours in the refrigerator. For meal prep, I store components separately and assemble the wraps the morning of.
What’s the best way to warm leftover chicken? → To maintain crispiness, reheat the chicken tenders in a 350°F oven for about 8-10 minutes. Microwaving will make them soggy.
Are these spicy? → As written, they’re mild and family-friendly. For heat lovers in my household, I add a pinch of cayenne to the flour mixture and use pepper Jack cheese for an extra kick.
Print
Honey Mustard Chicken Wraps
- Total Time: 35 minutes
- Yield: 4 wraps 1x
Description
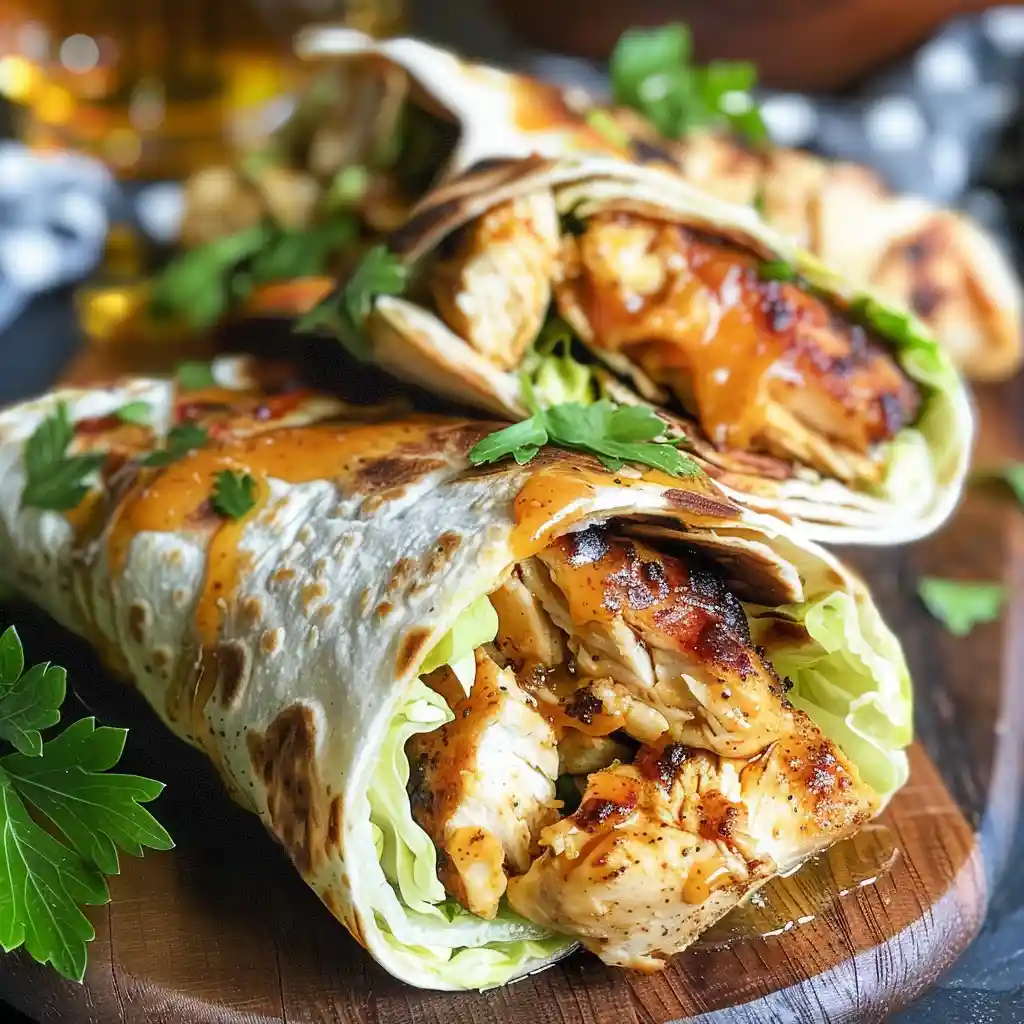
Crispy fried chicken tenders wrapped in soft tortillas with tangy honey mustard slaw, creating a perfect balance of flavors and textures in every bite. This satisfying meal combines crunchy cabbage, juicy tomatoes, and melty cheese for a delicious hand-held lunch or dinner option.
Ingredients
- For the slaw
- 3 cups shredded green cabbage
- 1/2 cup shredded carrot
- 1/2 cup honey mustard
- 1/4 teaspoon ground black pepper
- For the chicken
- High smoke point oil (vegetable oil, canola oil, or peanut oil)
- 1 pound chicken tenderloins
- 1/4 cup buttermilk
- 1 large egg
- 3/4 cup all-purpose flour
- 1 teaspoon garlic powder
- 1 teaspoon kosher salt
- 1 teaspoon onion powder
- 1 teaspoon paprika
- 1/2 teaspoon ground black pepper
- To assemble
- 4 large tortillas or wraps
- 1/2 cup diced tomato
- 1/2 cup sliced dill pickles
- 1 cup shredded cheese (pepper Jack, cheddar, Monterey Jack, or Colby Jack)
Instructions
- Heat the Oil: Begin heating the oil in a deep fryer or a cast-iron pan with oil at least three inches deep to 350 degrees. This temperature is crucial for achieving that perfect golden-brown exterior while keeping the chicken tender and juicy inside. Using a thermometer will help maintain consistent temperature throughout the cooking process.
- Prepare the Slaw: In a medium bowl, combine all of the ingredients for the slaw and set it aside. This allows the cabbage and carrots to slightly soften and the flavors to meld together while you prepare the chicken. The honey mustard will coat each strand of vegetable, creating a cohesive mixture.
- Create the Egg Wash: In a shallow bowl, whisk together the buttermilk and egg and set it aside. This mixture will help the flour coating adhere to the chicken and adds moisture to ensure juicy tenders.
- Mix the Flour Coating: In a second shallow bowl or dish, whisk together the flour, garlic powder, salt, onion powder, paprika, and black pepper. This seasoned flour mixture provides the flavorful, crispy exterior that makes these chicken tenders irresistible.
- Dredge and Fry the Chicken: In two batches, dredge the chicken tenderloins in the flour mixture, then in the buttermilk mixture, and once more in the flour mixture. This double-dredging technique creates an extra crispy coating. Transfer the chicken to the hot oil and fry for five minutes until golden brown and crispy. The internal temperature of the chicken should register 165 degrees. Transfer the chicken tenders to a paper towel-lined surface to absorb excess grease. Make sure to allow the oil temperature to return to 350 in between batches.
- Assemble the Wraps: To assemble, layer the center of each tortilla with honey mustard slaw, diced tomatoes, sliced pickles, shredded cheese, chicken tenders (you may slice or chop them into small pieces first if you desire), and additional honey mustard sauce if desired. Fold in one or both sides, fold the bottom flap over the top, and roll shut. Serve warm.
Notes
- For homemade honey mustard sauce, mix 1/4 cup Dijon mustard, 1/4 cup honey, 2 tablespoons mayonnaise, and 1 teaspoon vinegar. For a spicy version, add hot sauce to taste.
- You can substitute pre-cooked rotisserie chicken for a quicker version.
- These wraps can be made ahead and refrigerated for up to 24 hours. Wrap tightly in parchment paper or plastic wrap.
- For a lighter version, grill or bake the chicken instead of frying.
- Leftovers can be stored in the refrigerator for up to 3 days.
- Prep Time: 20 minutes
- Cook Time: 15 minutes
- Category: Main-course
- Method: Frying
- Cuisine: American
Nutrition
- Serving Size: 1 wrap
- Calories: 580
- Sugar: 12g
- Sodium: 950mg
- Fat: 28g
- Saturated Fat: 8g
- Unsaturated Fat: 18g
- Trans Fat: 0g
- Carbohydrates: 45g
- Fiber: 3g
- Protein: 35g
- Cholesterol: 115mg